Manually expand the new nodes of tars
Tags: “Pro version of the blockchain network” “” Expansion node “”
‘BcosBuilder ‘provides the function of expanding new nodes on the basis of existing groups. In this chapter, Building a Pro Blockchain NetworkOn the basis of the expansion of two new blockchain nodes, to help users master the Pro version of FISCO BCOS blockchain node expansion steps。
Note
Before performing node scaling, refer to ‘Building a Pro Blockchain Network<./installation.html>’_ Deploy Pro version blockchain。
1. Deploy tarsnode
Before scaling the blockchain node service, you need to install tarsnode on the machine where the scaled blockchain service node is deployed. To help users quickly experience the service scaling process on a single machine, this chapter directly virtualizes the container with IP address’ 172.25.0.5 ‘through the bridge network as the physical machine where the scaled blockchain service node is installed。
Note
-For the installation of tarsnode in the actual production environment, please refer to ‘tars installation and deployment<https://doc.tarsyun.com/#/markdown/ TarsCloud/TarsDocs/installation/README.md>`_ - If the tarsnode is already installed and the tarsnode is started, you can ignore this step
# Enter the operation directory
cd ~/fisco/BcosBuilder

# Linux system: Go to the directory where tarsnode docker-compose is located(macos system can be skipped)
cd docker/bridge/linux/node

# macos system: Go to the directory where tarsnode docker-compose is located(Linux system can be skipped)
cd docker/bridge/mac/node

# Install and start tarsnode
docker-compose up -d
2. Set the blockchain node expansion configuration
Note
In the actual operation, the tars token must be replaced with the tars web management platform [admin] ->User Center ->[token management] obtaining available tokens。
For more information about how to configure blockchain node service expansion, see the expansion template ‘conf / config-node-expand-example.toml’ of ‘BcosBuilder’. The specific configuration steps are as follows:
# Enter the operation directory
cd ~/fisco/BcosBuilder/pro

# Copy Template Configuration
cp conf/config-node-expand-example.toml config.toml

# Configure tars token: Through the tars web management platform [admin] ->User Center ->[token management] obtaining available tokens
# The token here is: eyJhbGciOiJIUzI1NiIsInR5cCI6IkpXVCJ9.eyJ1aWQiOiJhZG1pbiIsImlhdCI6MTYzODQzMTY1NSwiZXhwIjoxNjY3MjAyODU1fQ.430Gi
# Linux system(macOS system Skip this step):
sed -i 's/tars_token = ""/tars_token = "eyJhbGciOiJIUzI1NiIsInR5cCI6IkpXVCJ9.eyJ1aWQiOiJhZG1pbiIsImlhdCI6MTYzODQzMTY1NSwiZXhwIjoxNjY3MjAyODU1fQ.430ni50xWPJXgJdckpOTktJB3kAMNwFdl8w_GIP_3Ls"/g' config.toml
# macos system(Linux system skips this step):
sed -i .bkp 's/tars_token = ""/tars_token = "eyJhbGciOiJIUzI1NiIsInR5cCI6IkpXVCJ9.eyJ1aWQiOiJhZG1pbiIsImlhdCI6MTYzODQzMTY1NSwiZXhwIjoxNjY3MjAyODU1fQ.430ni50xWPJXgJdckpOTktJB3kAMNwFdl8w_GIP_3Ls"/g' config.toml
Configure ‘config.toml’ for scaling as follows:
[tars]
tars_url = "http://127.0.0.1:3000"
# Access the token of the tars service. During deployment, replace the token from the tars web management platform [admin] ->User Center ->[token management] obtaining available tokens
tars_token ="eyJhbGciOiJIUzI1NiIsInR5cCI6IkpXVCJ9.eyJ1aWQiOiJhZG1pbiIsImlhdCI6MTYzODQzMTY1NSwiZXhwIjoxNjY3MjAyODU1fQ.430ni50xWPJXgJdckpOTktJB3kAMNwFdl8w_GIP_3Ls"
tars_pkg_dir = ""

[chain]
# Chain ID
chain_id="chain0"

[[group]]
group_id="group0"
# the genesis configuration path of the expanded group
genesis_config_path = "generated/chain0/group0/config.genesis"
# use sm-crypto or not
sm_crypto=false

[[agency]]
name = "agencyA"
    [[agency.group]]
        group_id = "group0"

        [[agency.group.node]]
        node_name = "node1"
        deploy_ip = "172.25.0.5"
        # enable data disk encryption for bcos node or not, default is false
        enable_storage_security = false
        # url of the key center, in format of ip:port, please refer to https://github.com/FISCO-BCOS/key-manager for details
        # key_center_url =
        # cipher_data_key =

        [[agency.group.node]]
        node_name = "node2"
        deploy_ip = "172.25.0.5"
        # enable data disk encryption for bcos node or not, default is false
        enable_storage_security = false
        # url of the key center, in format of ip:port, please refer to https://github.com/FISCO-BCOS/key-manager for details
        # key_center_url =
        # cipher_data_key =
        monitor_listen_port = "3901"
        # monitor log path example:"/home/fisco/tars/framework/app_log/"
        monitor_log_path = ""
3. Expand the blockchain node service
# Enter the operation directory
cd ~/fisco/BcosBuilder/pro

# Scale out and deploy RPC services
python3 build_chain.py chain -o expand -t node
After the preceding command is executed, when the script outputs’ expand nodes for the given group success’, the blockchain node service is successfully expanded. The detailed log output is as follows:
=========================================================
----------- expand nodes for the given group -----------
* reload node config
* generate ini config, service: agencyAgroup0node1BcosNodeService, path: generated/chain0/group0/172.25.0.5/agencyAgroup0node1BcosNodeService/config.ini
* generate ini config for service: agencyAgroup0node1BcosNodeService success
* generate genesis config, service: agencyAgroup0node1BcosNodeService, path: generated/chain0/group0/172.25.0.5/agencyAgroup0node1BcosNodeService/config.genesis
* generate genesis config for service: agencyAgroup0node1BcosNodeService success
* reload node config
* generate ini config, service: agencyAgroup0node2BcosNodeService, path: generated/chain0/group0/172.25.0.5/agencyAgroup0node2BcosNodeService/config.ini
* generate ini config for service: agencyAgroup0node2BcosNodeService success
* generate genesis config, service: agencyAgroup0node2BcosNodeService, path: generated/chain0/group0/172.25.0.5/agencyAgroup0node2BcosNodeService/config.genesis
* generate genesis config for service: agencyAgroup0node2BcosNodeService success
* generate pem file for agencyAgroup0node1BcosNodeService
	- pem_path: generated/chain0/group0/172.25.0.5/agencyAgroup0node1BcosNodeService
	- node_id_path: generated/node.nodeid
	- sm_crypto: 0
* generate pem file for agencyAgroup0node2BcosNodeService
	- pem_path: generated/chain0/group0/172.25.0.5/agencyAgroup0node2BcosNodeService
	- node_id_path: generated/node.nodeid
	- sm_crypto: 0
deploy service agencyAgroup0node1BcosNodeService
deploy service agencyAgroup0node1BcosNodeService
upload tar package generated/./agencyAgroup0node1BcosNodeService.tgz success, config id: 22
deploy service agencyAgroup0node2BcosNodeService
deploy service agencyAgroup0node2BcosNodeService
upload tar package generated/./agencyAgroup0node2BcosNodeService.tgz success, config id: 23
----------- expand nodes for the given group success -----------
=========================================================
The RPC service-related configuration generated during the scaling process is located in ‘generated / \({chainID}/\){groupID}/${deploy_ip}’Directory, as follows:
$ tree generated/chain0/group0/172.25.0.5
generated/chain0/group0/172.25.0.5
├── agencyAgroup0node1BcosNodeService
│   ├── config.genesis
│   ├── config.ini
│   ├── node.nodeid
│   └── node
└── agencyAgroup0node2BcosNodeService
    ├── config.genesis
    ├── config.ini
    ├── node.nodeid
    └── node
s
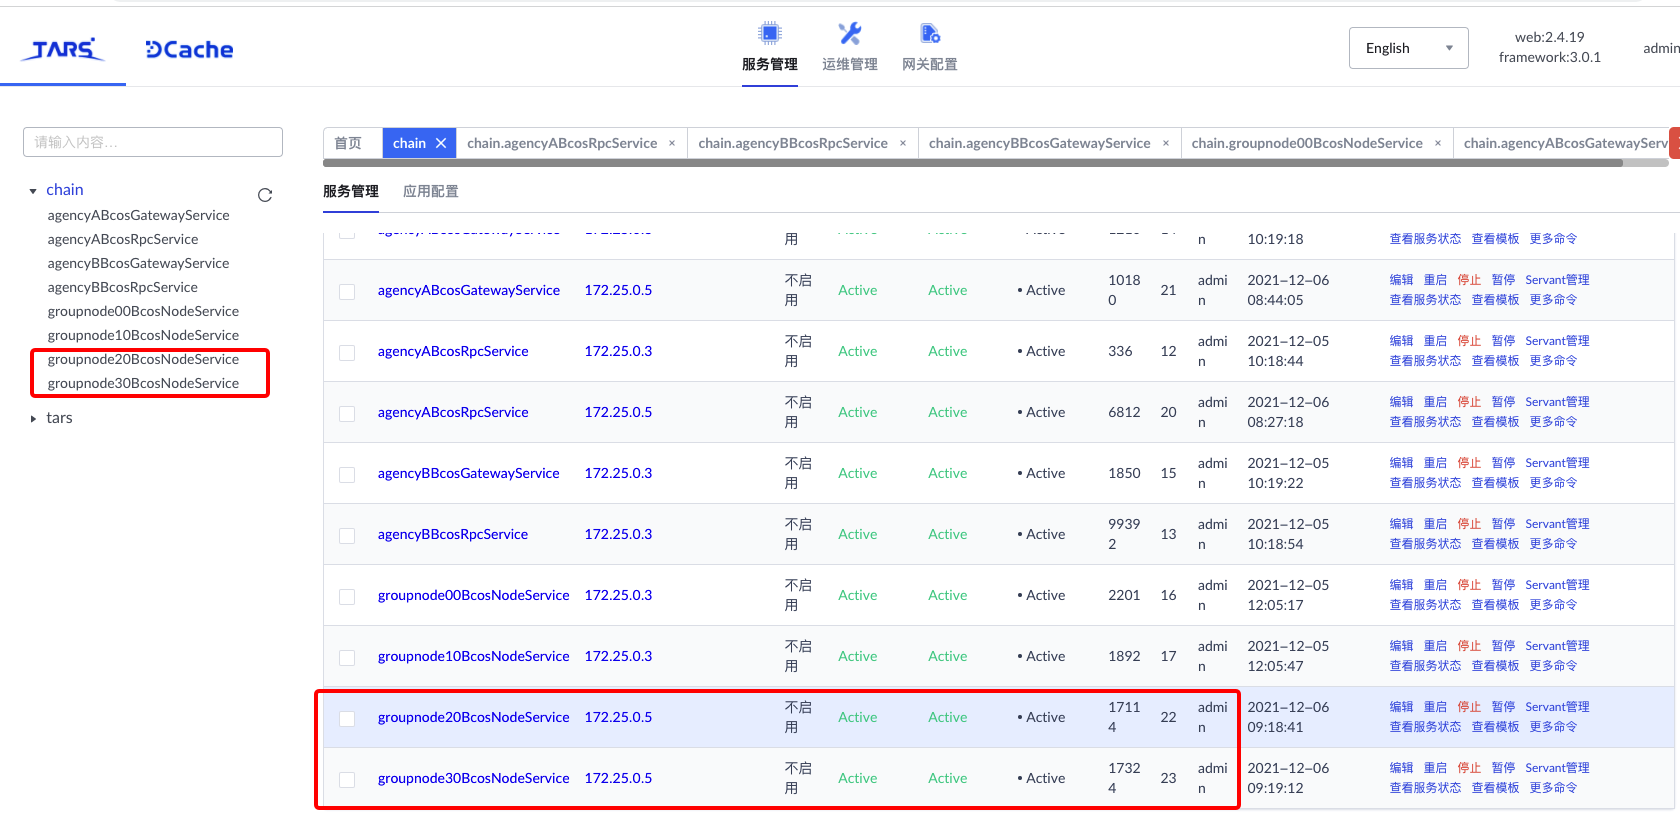
After the blockchain service is successfully expanded, you can see the new blockchain services’ agencyAgroup0node1BcosNodeService ‘and’ agencyAgroup0node2BcosNodeService ‘on the tars web management platform:
4. Add the new expansion node to the group
Note
When scaling a new node, we do not recommend that you add the node as a consensus node. You can add the node as a consensus node only when the block height of the scaling node is the same as the highest block height of the existing node in the chain。
Step 1: Obtain the NodeID of the scaling node
After the new node is successfully scaled out, you can view the list of new nodes through the ‘getGroupPeers’ command in the console:
[group0]: /> getGroupPeers
peer0: 0662759d9ff150b4e004f1e84a84dab15188e04c3772da1a10300302d6677f90dd2a36b75cefe5fcc08310999edf407dda9025332244186430561554f48ebc27
peer1: 23d88283fe20c959734c3a3e6f34fb1cb0db9e286ec6e31aa140245ca0bd8aa2a35e288e4d0e10430b8143e06aa46d1b80434a86a8f39980686b43577b415b90
peer2: 4af0433ac2d2afe305b88e7faae8ea4e94b14c63e78ca93c5c836ece6d0fbcb3d2a476a74ae8fb0a11e9662c0ce9861427c314aea7386cb3b619a4cb21ab227a
peer3: 8230e3ad1e7e929044a4ec8a5aca3c16744338a2fdd2865745aab9eef88f5a5c18b0d912a7a047966d112847d5c79eef46b32f7d9a2818adb601049126d289f3

[group0]: /> getSealerList
[
    Sealer{
        nodeID='8230e3ad1e7e929044a4ec8a5aca3c16744338a2fdd2865745aab9eef88f5a5c18b0d912a7a047966d112847d5c79eef46b32f7d9a2818adb601049126d289f3',
        weight=1
    },
    Sealer{
        nodeID='4af0433ac2d2afe305b88e7faae8ea4e94b14c63e78ca93c5c836ece6d0fbcb3d2a476a74ae8fb0a11e9662c0ce9861427c314aea7386cb3b619a4cb21ab227a',
        weight=1
    }
]
[group0]: /> getObserverList
[]
As can be seen from the console output, the nodeID is’ 0662759d9ff150b4e004f1e84a84dab15188e04c3772da1a10300302d6677f90ddd2a36b75cefe5fcc08310999edf407dda9025332241407718643056153f481ebc
Step 2: Add an expansion node as an observation node
[group0]: /> addObserver 0662759d9ff150b4e004f1e84a84dab15188e04c3772da1a10300302d6677f90dd2a36b75cefe5fcc08310999edf407dda9025332244186430561554f48ebc27
{
    "code":0,
    "msg":"Success"
}

[group0]: /> addObserver 23d88283fe20c959734c3a3e6f34fb1cb0db9e286ec6e31aa140245ca0bd8aa2a35e288e4d0e10430b8143e06aa46d1b80434a86a8f39980686b43577b415b90
{
    "code":0,
    "msg":"Success"
}

[group0]: /> getObserverList
[
    0662759d9ff150b4e004f1e84a84dab15188e04c3772da1a10300302d6677f90dd2a36b75cefe5fcc08310999edf407dda9025332244186430561554f48ebc27,
    23d88283fe20c959734c3a3e6f34fb1cb0db9e286ec6e31aa140245ca0bd8aa2a35e288e4d0e10430b8143e06aa46d1b80434a86a8f39980686b43577b415b90
]
Step 3: After the scaling node is synchronized to the highest block, add the scaling node as a consensus node
[group0]: /> addSealer 0662759d9ff150b4e004f1e84a84dab15188e04c3772da1a10300302d6677f90dd2a36b75cefe5fcc08310999edf407dda9025332244186430561554f48ebc27 1
{
    "code":0,
    "msg":"Success"
}

[group0]: /> addSealer 23d88283fe20c959734c3a3e6f34fb1cb0db9e286ec6e31aa140245ca0bd8aa2a35e288e4d0e10430b8143e06aa46d1b80434a86a8f39980686b43577b415b90 1
{
    "code":0,
    "msg":"Success"
}

[group0]: /> getSealerList
[
    Sealer{
        nodeID='8230e3ad1e7e929044a4ec8a5aca3c16744338a2fdd2865745aab9eef88f5a5c18b0d912a7a047966d112847d5c79eef46b32f7d9a2818adb601049126d289f3',
        weight=1
    },
    Sealer{
        nodeID='4af0433ac2d2afe305b88e7faae8ea4e94b14c63e78ca93c5c836ece6d0fbcb3d2a476a74ae8fb0a11e9662c0ce9861427c314aea7386cb3b619a4cb21ab227a',
        weight=1
    },
    Sealer{
        nodeID='0662759d9ff150b4e004f1e84a84dab15188e04c3772da1a10300302d6677f90dd2a36b75cefe5fcc08310999edf407dda9025332244186430561554f48ebc27',
        weight=1
    },
    Sealer{
        nodeID='23d88283fe20c959734c3a3e6f34fb1cb0db9e286ec6e31aa140245ca0bd8aa2a35e288e4d0e10430b8143e06aa46d1b80434a86a8f39980686b43577b415b90',
        weight=1
    }
]
Step 4: Deploy and invoke the contract
[group0]: /> deploy HelloWorld
transaction hash: 0x62b2fe3514ca22ea2126b7d6bcab1f2912e03503045b3b806ff2d87d605aca5c
contract address: 0x31eD5233b81c79D5adDDeeF991f531A9BBc2aD01
currentAccount: 0x537149148696c7e6c3449331d77ddfaabc3c7a75

[group0]: /> call HelloWorld 0x31eD5233b81c79D5adDDeeF991f531A9BBc2aD01 set "Hello, Fisco"
transaction hash: 0x21a44704b4d2f56108f071a61987e20be7627c2049437cc1a73db9b0e00f55f8
---------------------------------------------------------------------------------------------
transaction status: 0
description: transaction executed successfully
---------------------------------------------------------------------------------------------
Receipt message: Success
Return message: Success
Return value size:0
Return types: ()
Return values:()
---------------------------------------------------------------------------------------------
Event logs
Event: {}

[group0]: /> call HelloWorld 0x31eD5233b81c79D5adDDeeF991f531A9BBc2aD01 get
---------------------------------------------------------------------------------------------
Return code: 0
description: transaction executed successfully
Return message: Success
---------------------------------------------------------------------------------------------
Return value size:1
Return types: (string)
Return values:(Hello, Fisco)
---------------------------------------------------------------------------------------------