Experience of Building Fisco-Bcos Block Chain on Windows-10 Based on wsl / wsl2
Author : Huang Yi ( Sichuan Everything Digital Technology Co., Ltd. ) | FISCO BCOS Developer
I: Overview
Recently, some friends in the FISCO community mentioned that because of certain restrictions, only use the Windows platform for development, I hope to have a Windows-based Fisco-Bcos deployment tutorial。Just @ power Lin Xuanming’s teacher C# The SDK is also maturing, so I wrote this article in the hope of making it easier to deploy the Fisco development environment on Windows。
This paper describes the adoption of**Linux Subsystem for Windows(wsl/wsl2)**On the Windows-10 platform, there is no dual system / virtual machine burden to build the process and experience of Fisco-Bcos, then you can combine the development of Visual Studio and Fisco to build a more comfortable Windows development environment。
wsl and wsl2 are completely different in the underlying implementation, see https for differences://docs.microsoft.com/zh-cn/windows/wsl/compare-versions。
Based on the performance and compatibility of the first generation of wsl using linux middleware translation, we recommend using wsl2 based on lightweight hyper-v, for friends who do not want to use hyper-v, you can only use wsl, at least at this stage has not been found to have compatibility issues。
Because the steps for building a fisco are identical, this article will first build a fisco stand-alone 4-node blockchain on the wsl, and then switch to the wsl2 installation console to show that the two can be switched at any time。
II: Configuration requirements
Hardware:
The CPU of the home machine level is enough, the memory reaches more than 8GB, 16GB is recommended+, Considering that wsl can only be installed on the system disk, try to have 50G+Free system disk space。
Software:
Operating System: Windows 10 Professional / Enterprise (version 1903+), or Windows Server 2019 (version 1709+)。
Other tools: If you want to use .Net Sdk, we recommend Visual Studio 2019 Community and Visual Studio Code that are free and support .Net5。
3: Install wsl / wsl2 and linux distribution subsystem on Windows 10 (Ubuntu 20.04 LTS as an example)
Open PowerShell as an administrator
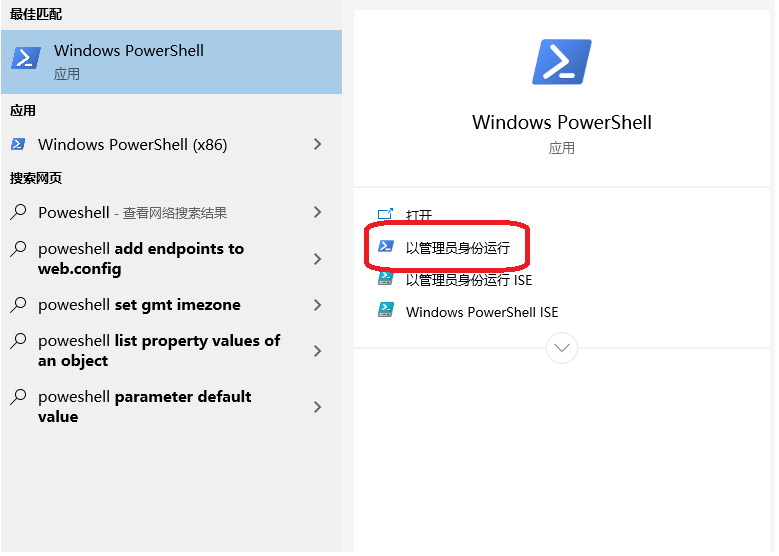
Type the following command to open wsl / wsl2 support
dism.exe /online /enable-feature /featurename:Microsoft-Windows-Subsystem-Linux /all /norestart
dism.exe /online /enable-feature /featurename:VirtualMachinePlatform /all /norestart

After successful enablement, restart the computer, download and install the wsl2 kernel update package
Links:https://wslstorestorage.blob.core.windows.net/wslblob/wsl_update_x64.msi
Open the Microsoft Store, download and install the Ubuntu 20.04 LTS subsystem
Links:https://www.microsoft.com/store/apps/9n6svws3rx71
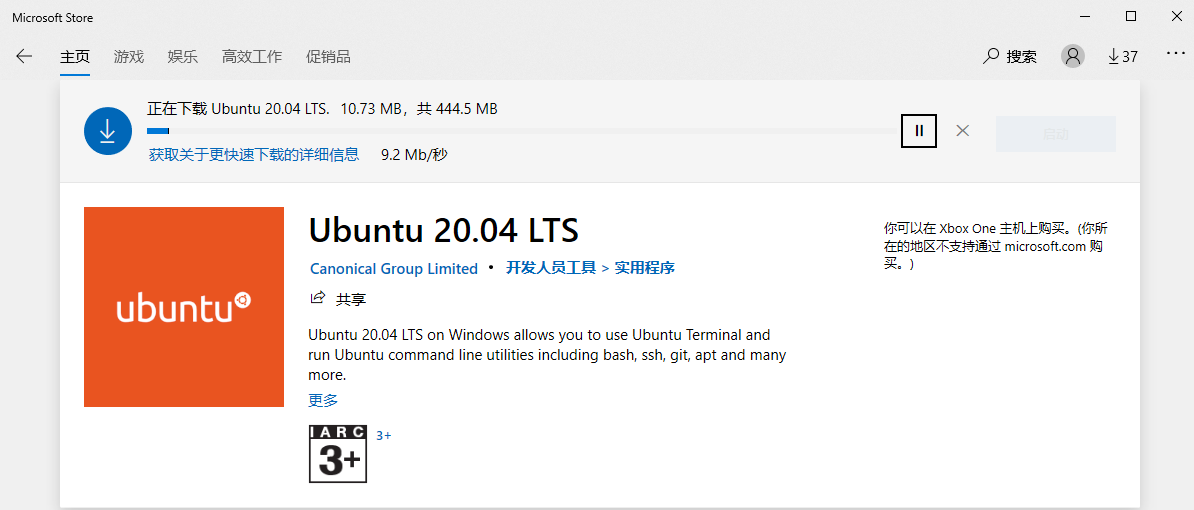
After installation, start Ubuntu 20.04 at least once, at which time the account password of the initial user will be required

After the setup is complete, type the following command in Powershell to view the Linux distribution package
wsl --list --verbose

You can see that Ubuntu is now using wsl version 1. Next, you will install and configure fisco on this system and demonstrate how to switch to wsl2。
Four: Based on wsl in the ubuntu20.04 subsystem to build a single 4 node
It is officially recommended to use Windows Termintal for operation. You can also use the shell or powershell that comes with Windows. Download link:https://aka.ms/terminal
Open the terminal and type directly
wsl
Enter the ubuntu subsystem, as shown in the figure below

Here you can see one of the features of wsl: you can directly access files in the NTFS file system(The starting position is located at c:\Users)and can call windows applications with the .exe suffix。
In the development period, for ease of management, you can put the FICO under the NTFS file system, such as “My Documents,” but do not configure it in a production environment, the Linux subsystem access across file systems will reduce performance。
Because it is a local subsystem, no network configuration is required. Refer to Building the First Blockchain NetworkQuickly deploy a single-machine 4-node FICO blockchain
cd ~
sudo apt install -y openssl curl
cd ~ && mkdir -p fisco && cd fisco
curl -#LO https://github.com/FISCO-BCOS/FISCO-BCOS/releases/download/v2.11.0/build_chain.sh && chmod u+x build_chain.sh
bash build_chain.sh -l 127.0.0.1:4 -p 30300,20200,8545
Final output All Completed

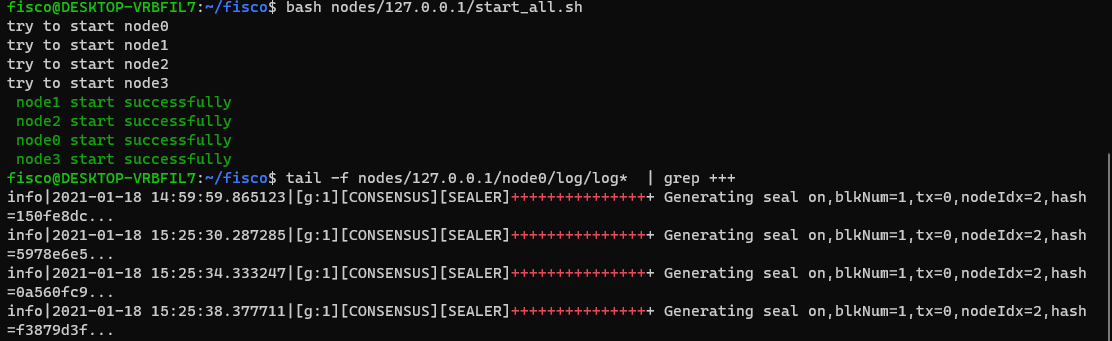
Next start the fisco node and observe the log output
bash nodes/127.0.0.1/start_all.sh
tail -f nodes/127.0.0.1/node0/log/log*  | grep +++
At the same time, since we are using wsl-1, we can view the 4-node linux process fisco-bcos and its resource usage in the task manager

By right-clicking the process, you can quickly locate the home directory of the Ubuntu subsystemDo not modify any files in this directory in WindowsTo access the home of wsl, enter:\ wsl $in the address bar of the explorer
Five: switch between wsl and wsl2
This section describes how to switch between wsl and wsl2, all tutorials in this book apply to both wsl and wsl2, you can switch wsl version at any step and continue the tutorial
First stop the fisco node you just started and exit the Ubuntu subsystem
bash nodes/127.0.0.1/stop_all.sh
exit
Next, switch the startup mode of the Ubuntu system to wsl2
wsl --set-version Ubuntu-20.04 2
Waiting for system transition

Start the FICO node you just installed again and observe the output
wsl
cd ~/fisco && bash nodes/127.0.0.1/start_all.sh
tail -f nodes/127.0.0.1/node0/log/log*  | grep +++
Similarly, you can switch back to WSL by using the following code after you stop FICO
wsl --set-version Ubuntu-20.04 1
Six: Install the FICO console
Please refer to [Building the First Blockchain Network] for installation tutorial(../../installation.md)In the installation console section, this article tries to make a brief integration introduction
Since the source of the Ubuntu subsystem is abroad, the download speed of jdk will be slow for domestic users
sudo chmod 777 /etc/apt/sources.list
notepad.exe /etc/apt/sources.list
If Notepad shows that the source file directory cannot be found, use the following code
sudo chmod 777 /etc/apt/sources.list
sudo vim /etc/apt/sources.list
Replace the entire file with
deb http://mirrors.aliyun.com/ubuntu/ focal main restricted universe multiverse
deb-src http://mirrors.aliyun.com/ubuntu/ focal main restricted universe multiverse
deb http://mirrors.aliyun.com/ubuntu/ focal-security main restricted universe multiverse
deb-src http://mirrors.aliyun.com/ubuntu/ focal-security main restricted universe multiverse
deb http://mirrors.aliyun.com/ubuntu/ focal-updates main restricted universe multiverse
deb-src http://mirrors.aliyun.com/ubuntu/ focal-updates main restricted universe multiverse
deb http://mirrors.aliyun.com/ubuntu/ focal-proposed main restricted universe multiverse
deb-src http://mirrors.aliyun.com/ubuntu/ focal-proposed main restricted universe multiverse
deb http://mirrors.aliyun.com/ubuntu/ focal-backports main restricted universe multiverse
deb-src http://mirrors.aliyun.com/ubuntu/ focal-backports main restricted universe multiverse
Save and Close, sequentially
sudo apt update && sudo apt install -y default-jdk
cd ~/fisco && curl -LO https://github.com/FISCO-BCOS/console/releases/download/v2.9.2/download_console.sh && bash download_console.sh
cp -n console/conf/config-example.toml console/conf/config.toml
cp -r nodes/127.0.0.1/sdk/* console/conf/
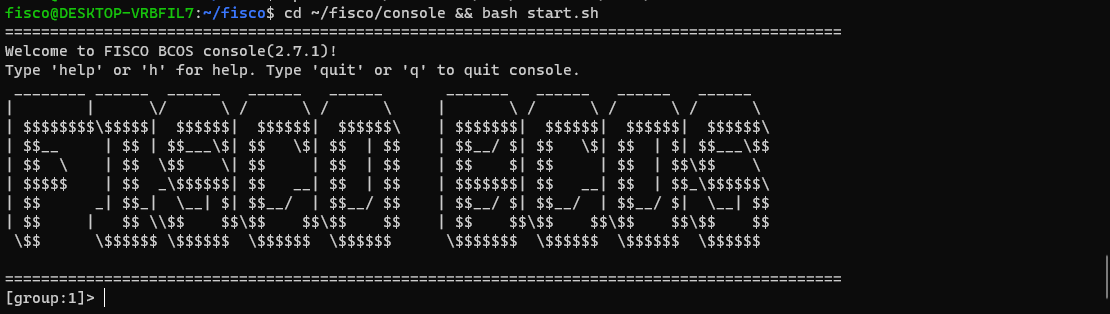
cd ~/fisco/console && bash start.sh
After startup, you will see the following screen and the console deployment is successful
Seven: Visual Studio development examples using csharp-sdk
This article uses @ power teacher’s csharp-sdk and its tutorials, thanks to power teacher’s hard work。
git address:https://github.com/FISCO-BCOS/csharp-sdk
Tutorial address:https://www.bilibili.com/video/BV1av41147Lo
1. Establish new project, introduce C#-SDK
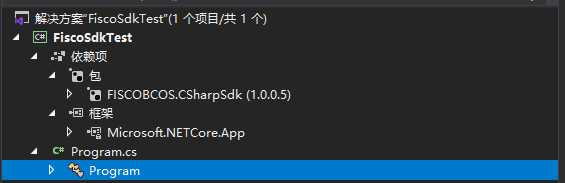
Open vs2019, build a console project based on .net core 3.1, open the nuget package controller, and search for “fiscobcos”
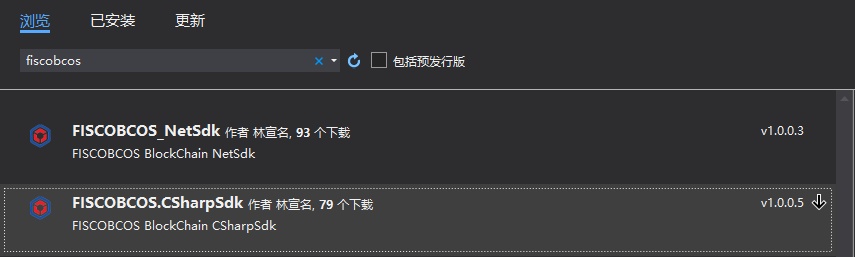
Select the FISCOBCOS. CSharpSdk package to install to the project
2. Compile the sample contract HelloWorld
Compile the project and create a contracts folder in the project output directory

Switch to Terminal and copy the HellowWorld.sol contract in the console you just downloaded to the contracts folder you just created
cp ~ / fisco / console / contracts / consolidation / HellowWorld.sol [your contracts directory]
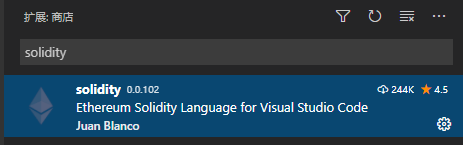
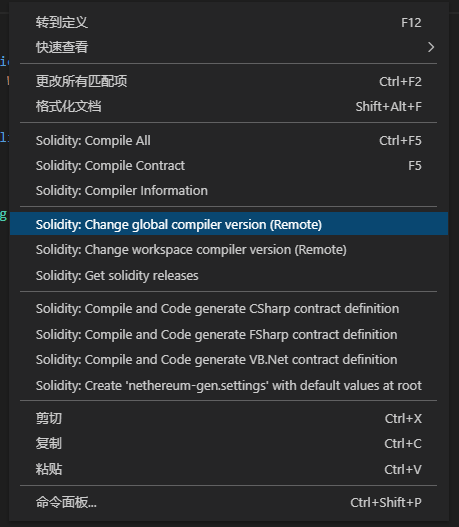
Open HelloWorld.sol with vscode, install the solidity plugin and switch to version 0.4.25
Press F5 to compile the contract. The bin folder will be generated under contracts, and the compiled HelloWorld.bin and HelloWorld.abi will be generated
3. Interaction with FICO
Modify Program.cs as follows
using System;
using FISCOBCOS.CSharpSdk;
using FISCOBCOS.CSharpSdk.Dto;
using FISCOBCOS.CSharpSdk.Utis;

namespace FiscoSdkTest
{
    class Program
    {
        static void MakeAccount()
        {
            var account = AccountUtils.GeneratorAccount("testAdmin");
            var accountString = account.ToJson();
            Console.WriteLine($"Generate account information:\ n{accountString}\n---------------");
        }

        static void Main(string[] args)
        {
            MakeAccount();
        }
    }
}
Compile and execute, observe the output

Use the private key of the account to deploy the HelloWorld contract. Modify the code as follows
using System;
using FISCOBCOS.CSharpSdk;
using FISCOBCOS.CSharpSdk.Dto;
using FISCOBCOS.CSharpSdk.Utils;
using FISCOBCOS.CSharpSdk.Utis;

namespace FiscoSdkTest
{
    class Program
    {
        static void MakeAccount()
        {
            var account = AccountUtils.GeneratorAccount("testAdmin");
            var accountString = account.ToJson();
            Console.WriteLine($"Generate account information:\ n{accountString}\n---------------");
        }

        static void DeployContract(string privateKey)
        {

            var contractService = new ContractService("http://127.0.0.1:8545", BaseConfig.DefaultRpcId, BaseConfig.DefaultChainId, BaseConfig.DefaultGroupId, privateKey);
            string binCode = "";
            string abi = ";";
            FileUtils.ReadFile(Environment.CurrentDirectory + "\\contracts\\bin\\" + "HelloWorld.bin", out binCode);
            FileUtils.ReadFile(Environment.CurrentDirectory + "\\contracts\\bin\\" + "HelloWorld.abi", out abi);
            var result = contractService.DeployContract(binCode, abi);
            Console.WriteLine($"Deployment contract result:\ n{result}");
        }

        static void Main(string[] args)
        {
            string privateKey = args[0];
            DeployContract(privateKey);
        }


    }
}
Compile and execute, observe the output

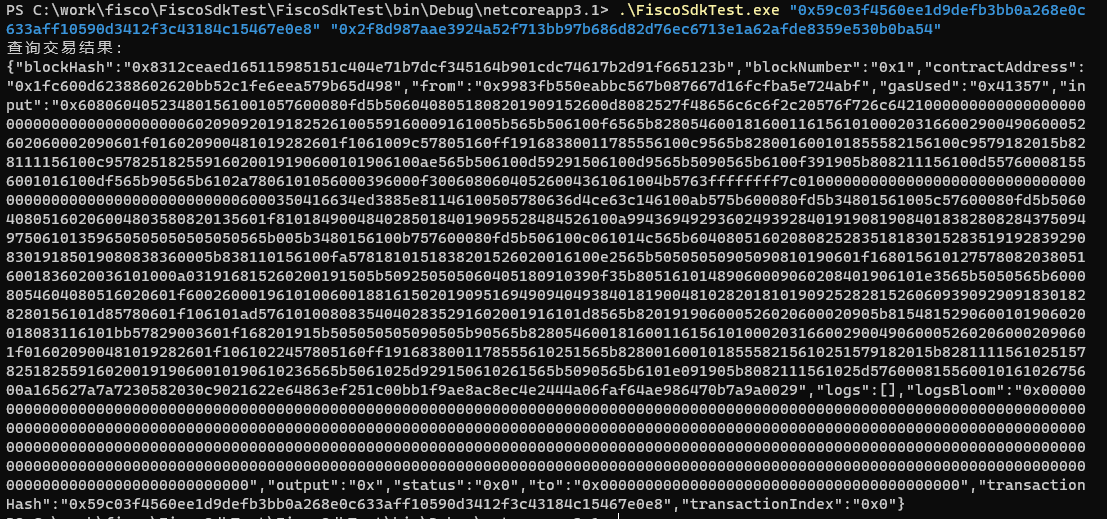
Next, let’s look at the results of the transaction that just deployed the contract and modify the code as follows
using System;
using FISCOBCOS.CSharpSdk;
using FISCOBCOS.CSharpSdk.Utis;

namespace FiscoSdkTest
{
    class Program
    {
        static void TestGetTranscationResult(string txHash,string privateKey)
        {
            var contractService = new ContractService("http://127.0.0.1:8545", BaseConfig.DefaultRpcId, BaseConfig.DefaultChainId, BaseConfig.DefaultGroupId, privateKey);
            var result = contractService.GetTranscationReceipt(txHash);
            Console.WriteLine($"Query transaction results:\ n{result.ToJson()}");
        }

        static void Main(string[] args)
        {
            string txHash = args[0];
            string privateKey = args[1];
            TestGetTranscationResult(txHash,privateKey);
        }
    }
}
You can see the receipt of this transaction, the return code is 0x0, and the deployed contract address is 0x1fc600d62388602620bb52c1fe6eea579b65d498
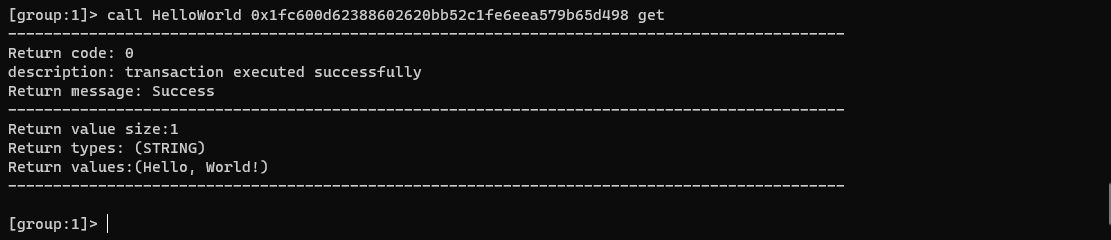
Switch to the console in the previous section and try calling HelloWorld’s get
call HelloWorld 0x1fc600d62388602620bb52c1fe6eea579b65d498 get
The results are as follows
At this point, using Visual Studio in conjunction with csharp-sdk for local development of fisco on Windows is over. For other features of charp-sdk, see the link at the beginning of this section